# Membership
{% hint style="info" %}
A **Membership Card** gives customers exclusive access to benefits for a set period.\
It can work with or without Stripe, depending on whether you want automated subscription renewals.
How it works:
* The customer buys a membership.
* The card displays their membership status and expiration date.
* You can manually renew the membership from the client's profile, or — if Stripe is connected — it renews automatically.
* When scanned, the card shows whether it’s valid or expired.
* You can also track visits and attendance directly through the membership card.
Memberships suit any business offering VIP access or exclusive privileges — for example, a hair salon where club members are served by senior stylists, or a wellness center offering priority booking.
"Limit" in membership refers to the **number of days** the membership is valid.
{% endhint %}
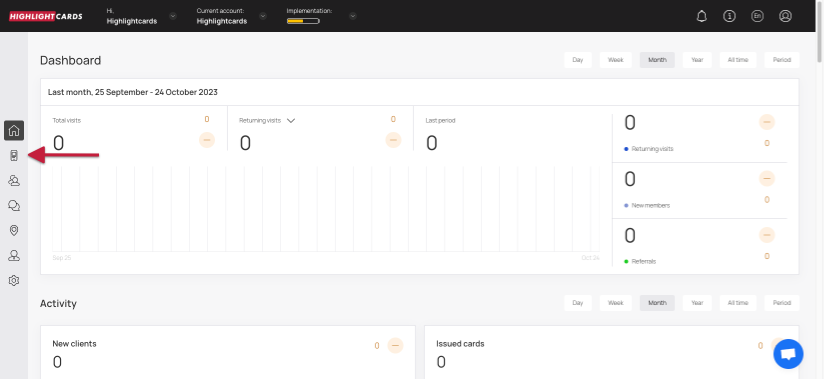
1. Upon successful login, navigate to the left-hand menu.
2. From the list of modules, click the icon. Doing so opens the Cards module.
Cards
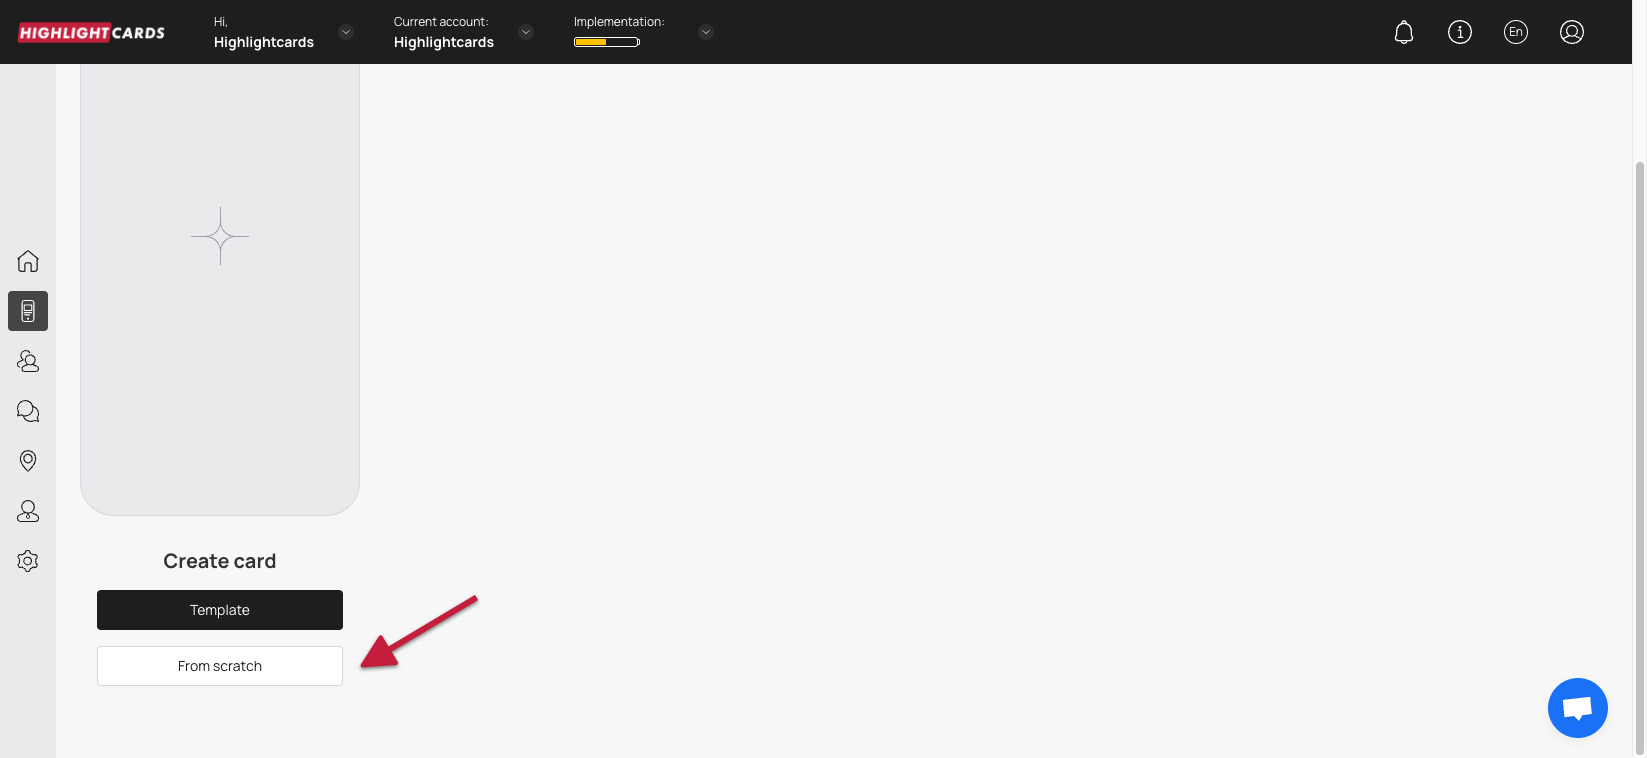
3. Here, you can either create a card using a template from a list of a wide range of pre-loaded templates or create one from scratch. To develop a better understanding, we will take a look at card creation from scratch.
4. To do so, click the button.
From Scratch
5. This initiates the card creation workflow. A card is created by filling in the details in 5 sections that include Card Type, Settings, Design, Information, and Save and preview. Let us take a look at how each section works.
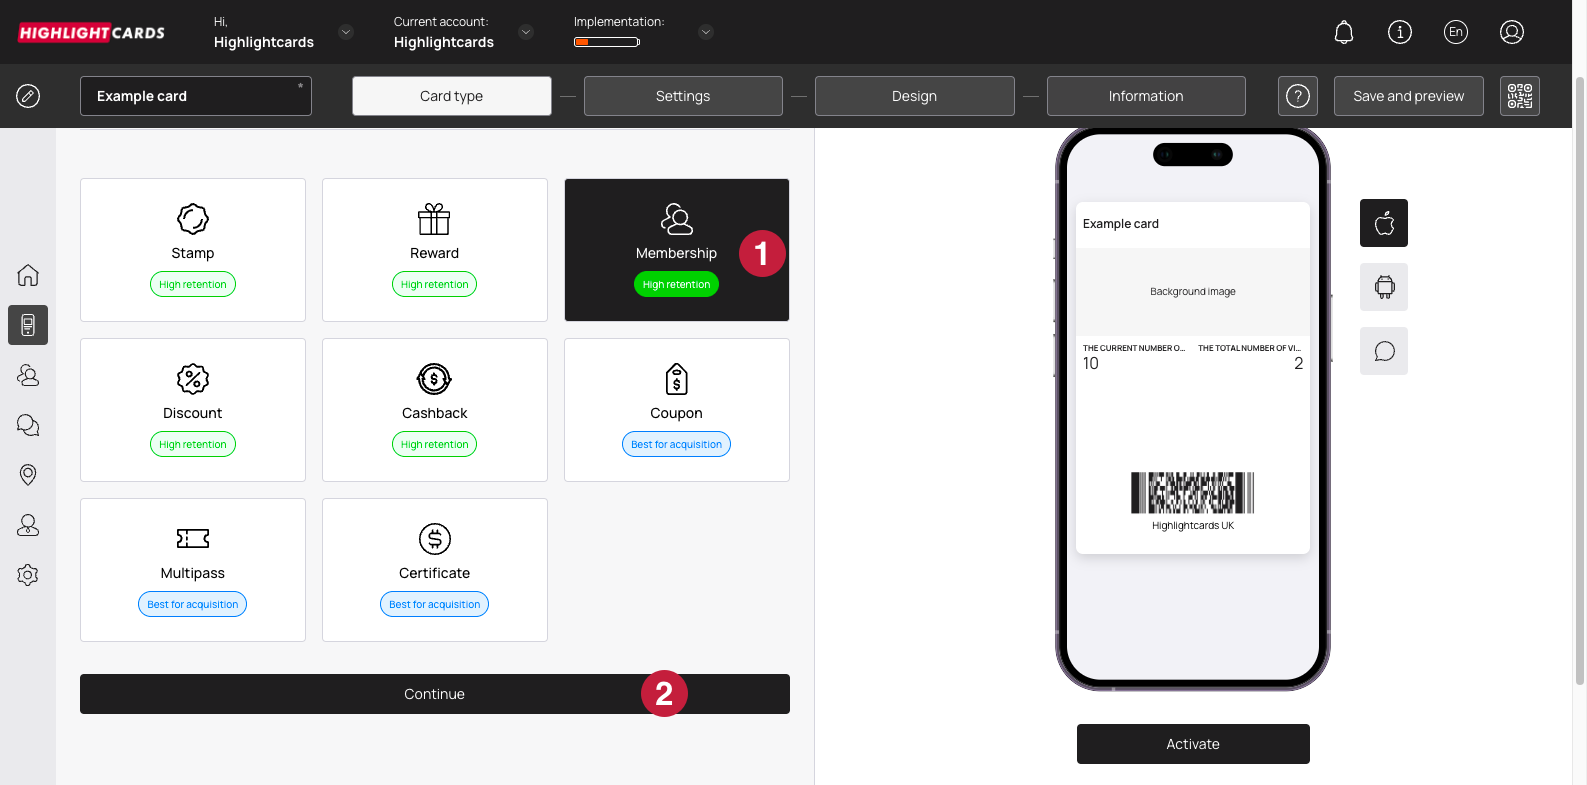
#### **Card Type**
1. This section lets you choose the type of card you want to create.
2. Once selected, click the **Continue** button. This takes you to the Settings section.
Card Type
#### **Settings**
Here, choose the Barcode Type to determine how the card can be scanned and recognized by the system. You can choose the appearance you like.
**Membership Settings Overview**\
This section lets you configure the membership mechanics of the card you are creating.
a) Customize payment collection — available only when Stripe is connected.\
b) If payment collection is disabled, the membership card becomes free.
You can also set up **Membership V1**, which is a free membership card with no tiers or limits.
**What Is Membership V1**\
Membership V1 is a simple member/participant card (club pass).\
It does **not** use points, rewards, or cashback.\
It is designed purely to identify active members and give them access to services or privileges.
Key notes:\
• Tracks membership status (active / expired).\
• You can log visits or attendance using the scanner — but no points are used.\
• Renewals can be handled manually or automatically (if Stripe is enabled).\
• The registration form and card mechanics cannot be changed after creation — create a new card if needed.\
• If auto-renewal is disabled, the membership becomes lifetime unless expiration is set manually.
**Set the expiration date of the membership**\
If auto-renewal is disabled, the expiration date depends on what you set manually.
Use the radio buttons under Card Expiration Date to set the validity of the membership.\
If you choose **Fixed term after card issuing**, the Term dropdown appears so you can choose the number of days after activation until the card expires.
Card expiration date unlimited — The card has no expiration date.\
Card expiration date Fixed term — The card becomes inactive after the selected date.\
Card expiration date Fixed term after card issuing — Choose the number of days after activation at which the card expires.
✅ Regardless of the period for which the customer paid, the card will cease to be valid once it reaches the expiration date.
**Membership tier unit measure name**\
Set the label for the units shown on the card — such as *Visits*, *Washes*, *Classes*, *Massages*, or *Access*.\
This label only changes what the card displays (“Available: 8 Visits”) and does not affect pricing logic.
**Trial period**\
Set a free trial for new members.\
The trial period can be between **0 and 30 days**.\
If set to 0, no trial is offered.
**Customize membership levels**\
You can create multiple membership levels.
a) Create a name and description for each level.\
b) Set pricing and limits for each billing period.\
✅ Once activated, prices cannot be changed.\
c) Specify the benefits included in each level.
Cards with limits will receive push notifications whenever visits or periods update.
Notes:\
• If Stripe payment collection is disabled, cards issued via a public link will assign the minimum tier and recommended period.\
• When issuing cards manually (bulk issuance), you can assign tiers and periods yourself.\
• You can later change the tier in the customer profile.\
• You may disable any membership level (for example, to stop selling a daily membership).
**Card Issuing Form**\
Here, select the type of field you want to include. Enter the field name.\
Enable *Required* if the customer must fill out the field.\
Enable *Unique* if the field must contain unique data (phone number, email).
To add a new field, click Add Field.\
Choose the Field Type (text, email, number, etc.) and enter the Field Name.
To remove a field, click the bin icon.\
You can also rename existing fields.
⚠️ Avoid making Name, Surname and Date of Birth unique — customers with the same name would not be able to install the card.
✅ For membership cards, the email field is mandatory.\
You can also add a photo field so the client’s photo appears on the front of the card.
**Locations**\
Enter location(s) where you want geolocation push notifications triggered.\
Customers with the card in Apple Wallet receive a push when within 100 meters of the location.\
You may add multiple locations, including non-business addresses.
**Language**\
Choose the language in which you want to create the membership card.
**Date Format**\
Controls how dates appear on the card.\
If the card has no expiration date, this setting is not relevant.
**Thousands Separator / Decimal Separator**\
Irrelevant for membership cards, because they do not use point balances.\
(For other card types, this changes how numbers are displayed.)
**Purchase amount when charging**\
The "Purchase amount when charging" setting, if turned on, requires the purchase amount to be entered whenever a transaction is processed.\
The entered amount will appear in ROI statistics and revenue totals.\
✅ Applies only to scanner transactions.\
If disabled, the amount field is optional.
**UTM**\
Here, you can create trackable links for your marketing channels.\
For example, entering “Facebook” will make Highlightcards auto-generate a UTM-tagged URL.
You can create unlimited UTM-tagged links.\
Each UTM tag also generates a QR code.\
Later, statistics will show how many customers installed the card through each channel.
✅ You can also build customer segments based on UTM tags — highly recommended when starting a loyalty program.
**Phone mask**\
Use the Phone Mask dropdown to set the default country prefix shown during card installation.\
Customers with foreign numbers can manually change the region.
**Privacy Policy**\
If enabled, privacy policy text appears on the installation form.\
You can edit or add text as required.
If you want customers to explicitly consent to personal data processing, enable the Consent toggle.
**Google Wallet Installation button / PWA Installation button**\
Choose where customers can install the card.
If additional options like Telegram bot are connected to your account, they will appear automatically on the card installation form.
Google Wallet Installation button — Shows a button allowing customers to add the card to Google Wallet.\
PWA Installation button — Shows the PWA button, allowing customers to install the card as a Progressive Web App (works like a mobile app without installation from an app store).
**Limit the number of cards issued**\
Controls how many membership cards can be distributed.\
0 means unlimited.
**Limit the number of customers’ check-ins per day**\
Prevents the cardholder from using the membership more than once per day.\
Example: At a car wash, the customer cannot redeem two visits in one day.
**Analytics**\
If needed, paste a custom analytics script into the Analytics field.
Once the selections are made, click the Continue button to move to the Design section.
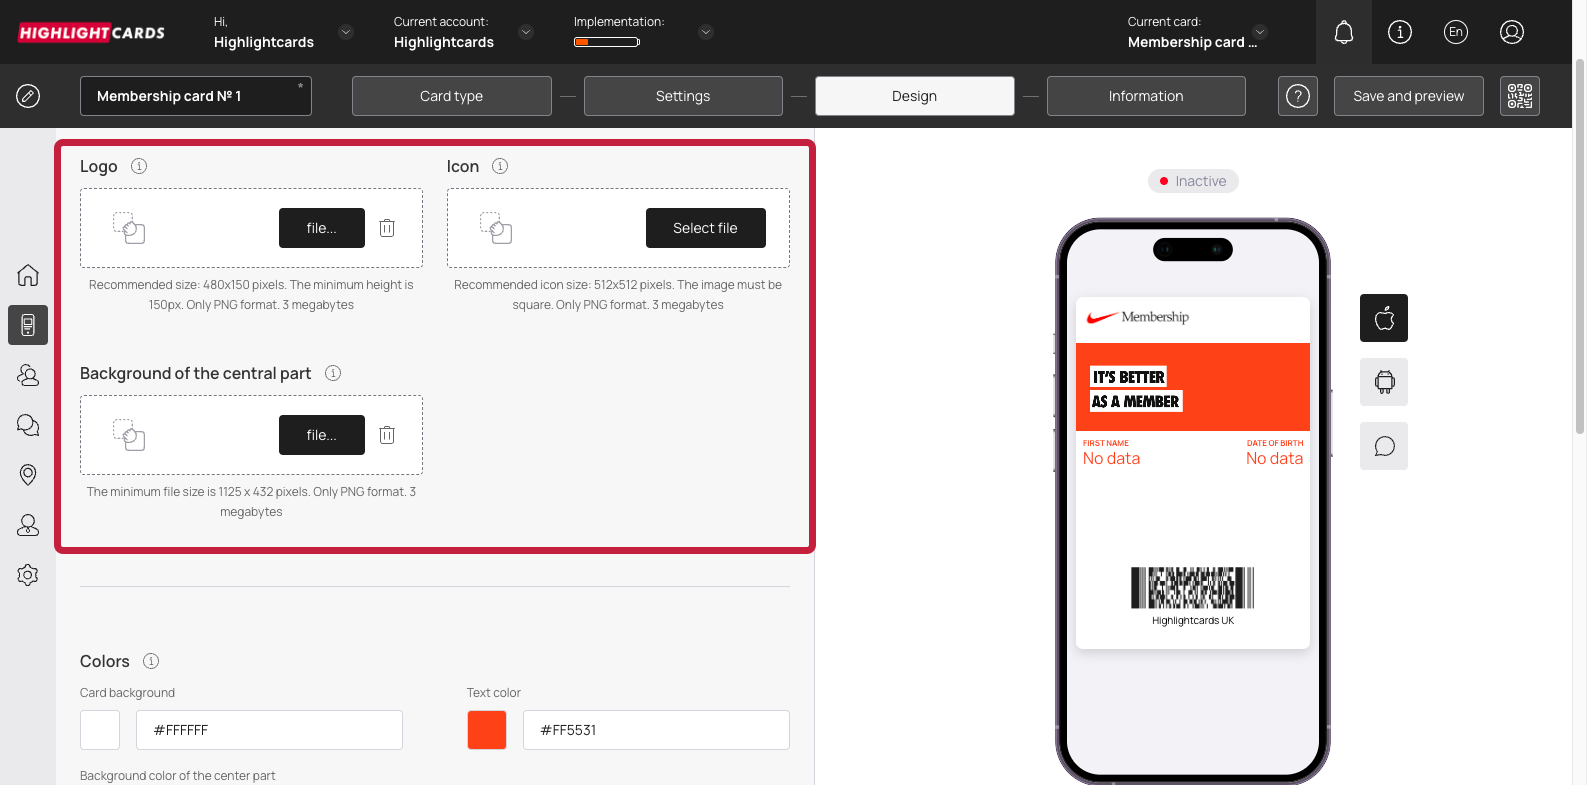
#### **Design**
1. This section lets you configure the design of the card.
2. Click the **Select File** button from the **Logo** heading to choose a logo to be displayed on the card and on the release form from your system storage.
Select File - Logo
3. Similarly, click the Select File button from the **Icon** heading to choose an icon from your system storage to be displayed in the push messages.
4. Choose an icon from your system storage for the center of the card by clicking the Select File button under the **Background of the central part** heading.
5. From the Colors section, you can set the colors for Card Background, Text Color, and Background color of the central part.
Colors
6. From the Fields Name heading, you can use the **Field** dropdown to select the type of field that appears on the card.
Field
7. Similarly, the Field Name field allows you to enter what text appears on the card in the defined field.
8. In case you want the logo to appear on the Card Issuing Form, enable the Show logo at card issuing form toggle button.
9. Similarly, enable the Show background color on card issuing form toggle button in case you want the background color to appear on the card issuing form.
10. Once all the selections are made, click the **Continue** button. Resultantly, you land on the **Information** section.
#### **Information**
1. This section lets you fill relevant information in the card. The impact of each field can be viewed in the mobile screen preview displayed on the right side of the screen.
2. Use the **Card Description** field to enter a short description of the card.
Card Description
3. Use the **Company Name** field to enter the name of your business.
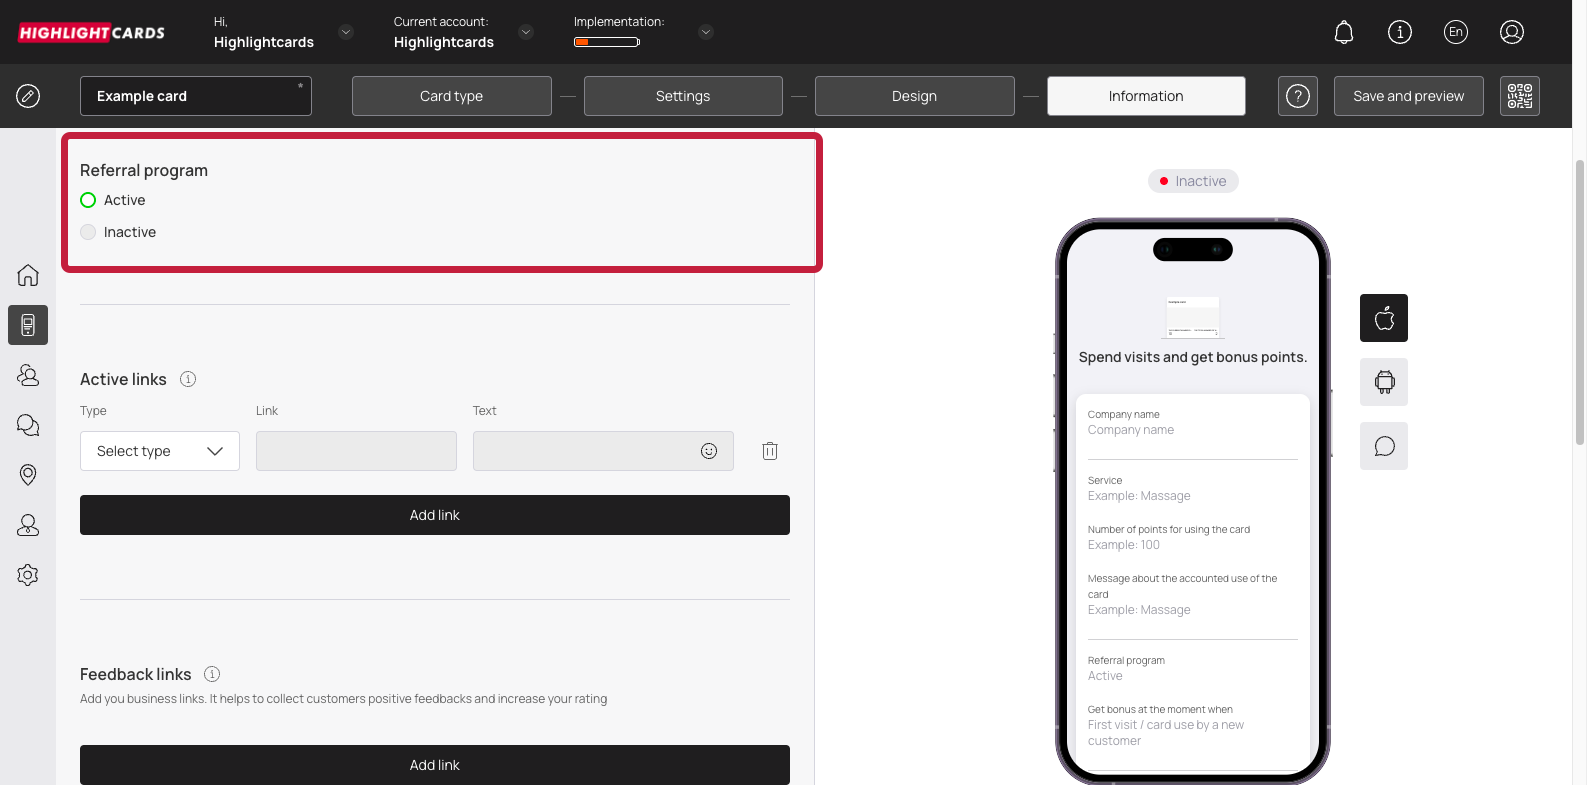
4. Choose whether you want to activate the referral program using the Active and Inactive radio buttons under the **Referral Program** heading.
Referral Program
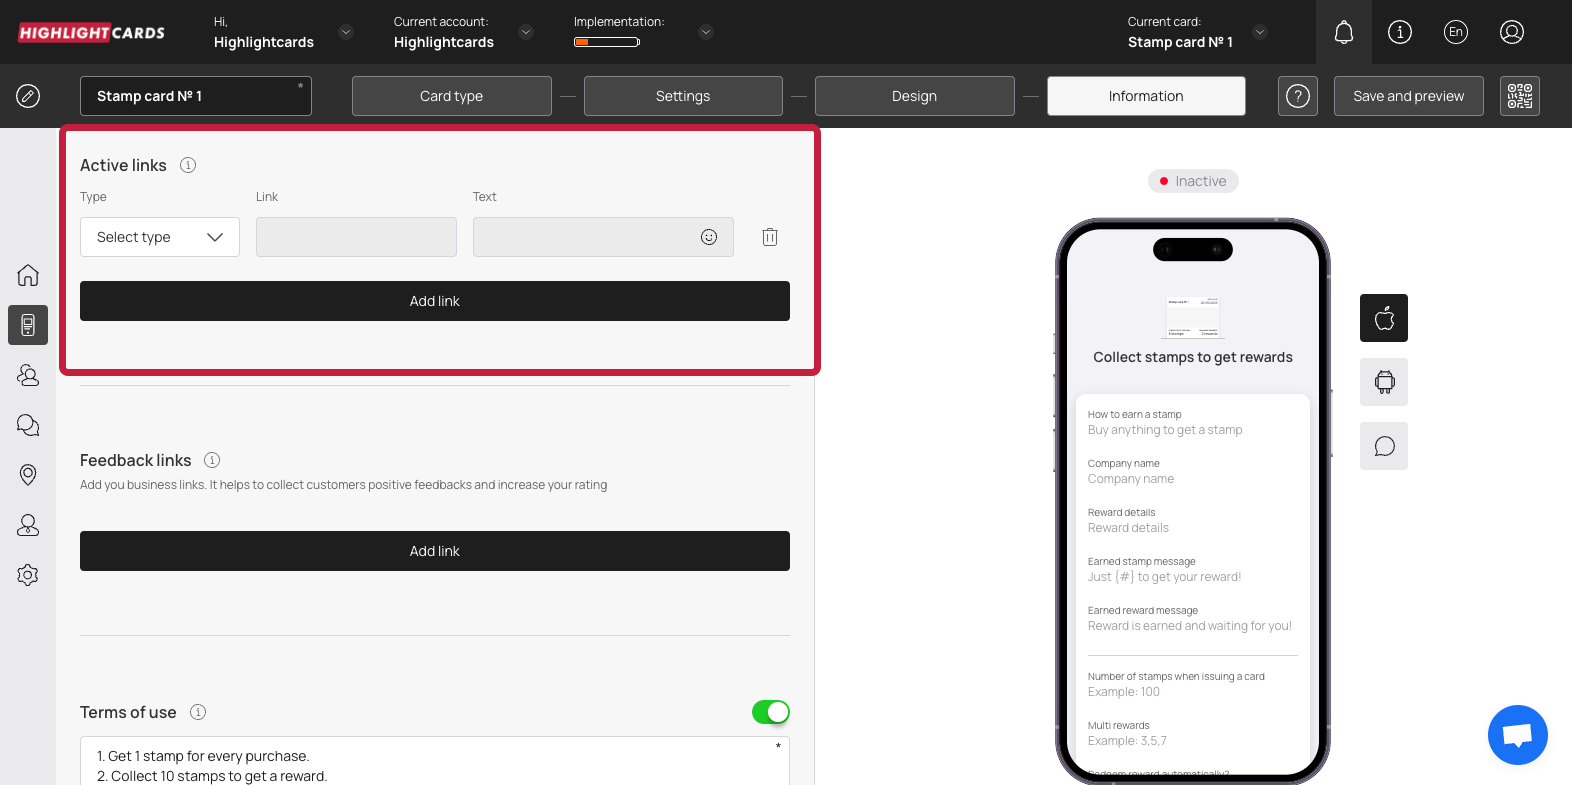
5. From the Active Links heading, choose the type of link you want to include on the card using the **Type** dropdown. The available options include URL, Phone, Email, and Address.
Type
6. Enter the website URL in the **Link** field.
7. Enter the text to appear on the card using the **Text** field.
8. To remove an active link, click the bin button.
9. To add another link, click the **Add Link** button. This adds a new row for another link to be recorded.
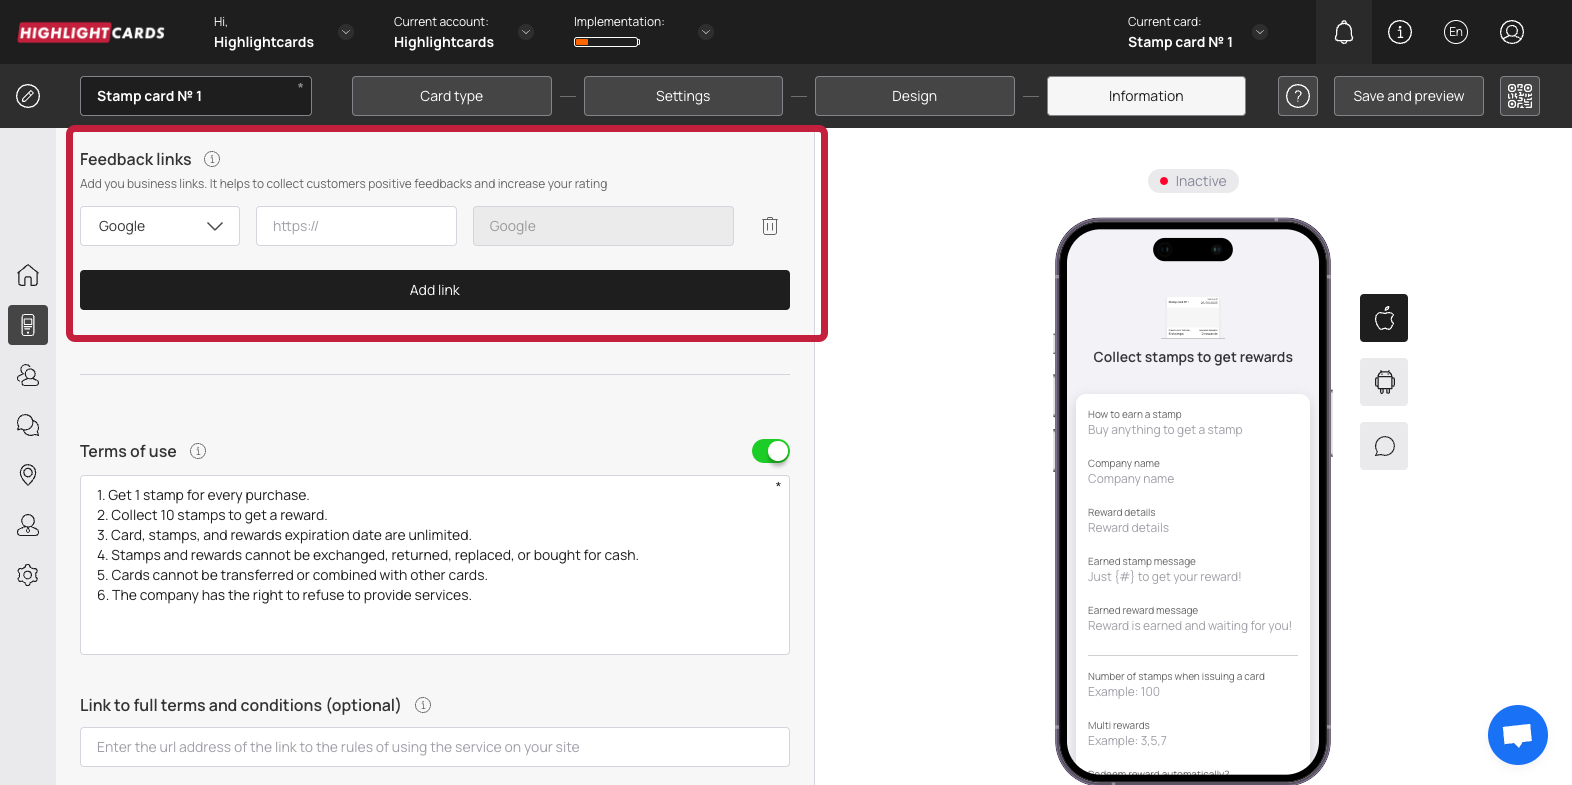
10. Similarly, use the link type dropdown and link fields under the Feedback Links heading to add your business links for the customer reviews to be recorded.
Feedback Links
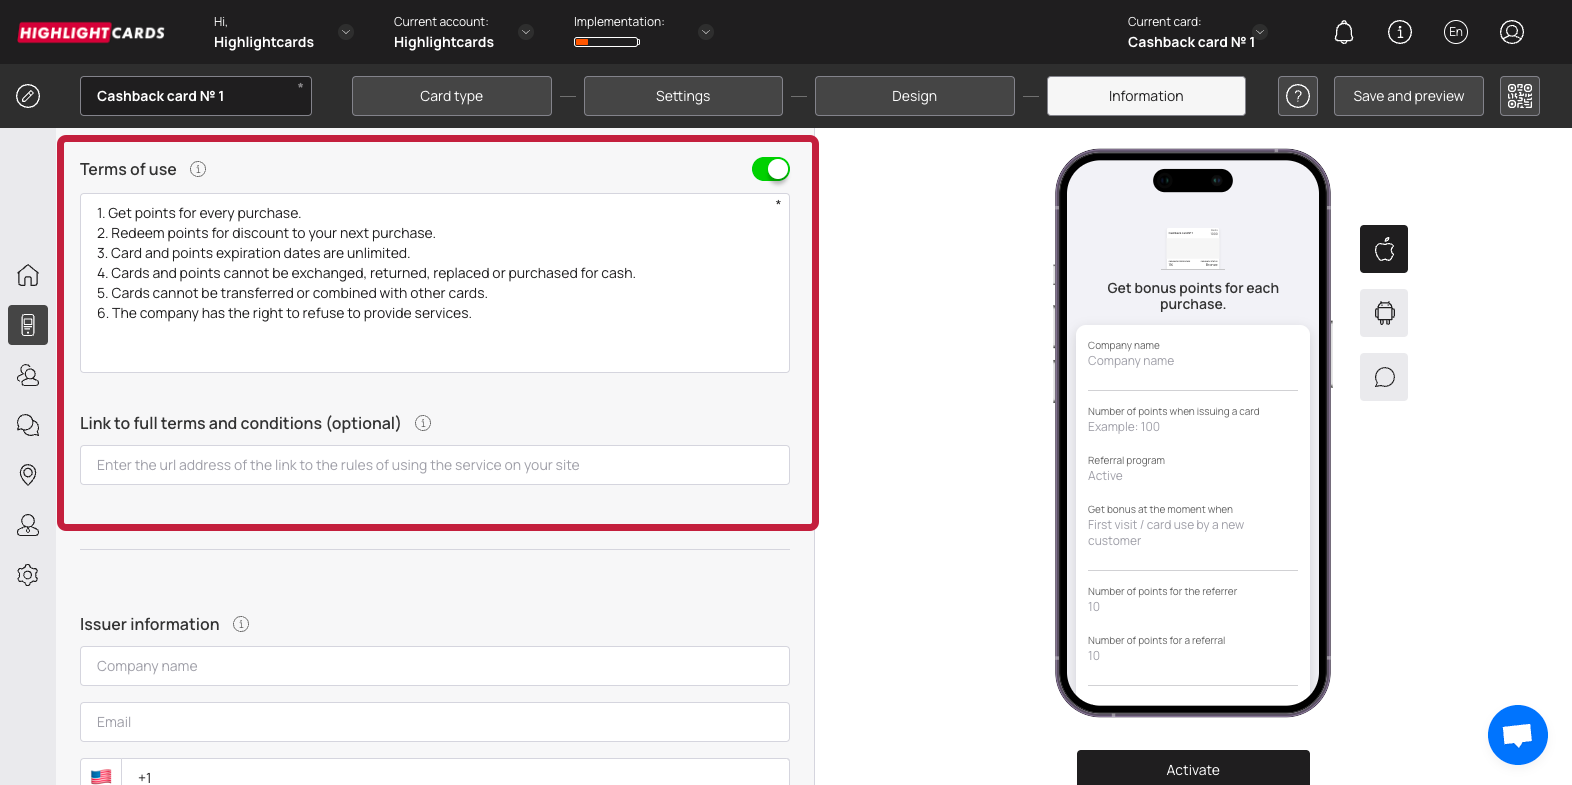
11. In case you want to include Terms of use on the card, enable the toggle button next to Terms of Use heading.
Toggle
12. Enter any terms of use you want to include on the card using the Terms of Use field.
13. Use the Link to full terms and conditions field to provide a link to the complete T\&Cs of your business.
14. Use the Company Name, Email, and Contact Number fields under the Issuer Information heading to record the card issuer details to be displayed at the back of the card.
15. To activate the template, click the **Activate** button under the card preview.
Activate
**Save & Preview**
1. As the Finish button is clicked, the Preview popup is displayed.
2. From here, you can scan the QR code of the card.
3. To copy the link of the car, click the **Copy link** button.
 icon. Doing so opens the Cards module.
 button.


.png?alt=media&token=df9bedd4-c0bf-459c-9074-382619de7b03)

.png?alt=media&token=4f9282fb-903d-4eb5-b4bd-3cf294cccfc7)